A DIY chicken waterer can be as simple as a bucket that refills a tray—or as “set it and forget it” as a PVC nipple line. The best choice depends on three things: how many birds you have, how often you want to refill, and how messy your flock is (spoiler: they’re all messy). We like DIY builds because you can size them to your run, hang them at the right height, and make cleaning faster—without paying for features you don’t need.
This guide walks you through beginner-friendly options for diy chicken watering, including a quick chick waterer, a low-mess bucket setup, a pvc chicken waterer diy nipple line, and winter-safe notes for a diy heated chicken waterer. Along the way, we’ll call out the common mistakes we see (like “mystery leaks” from skipped gaskets) and show simple fixes. You’ll also find hygiene and biosecurity habits that matter more than people think, especially with kids around the coop.
Pick The Right DIY Waterer Style For Your Flock
Before you buy parts, decide what you’re trying to “solve.” Most backyard keepers want one (or more) of these wins: less bedding kicked into water, fewer refills, fewer algae problems, and no freezing in winter. Here’s how the common DIY styles stack up:
- Gravity bucket + tray base: Easiest build and easiest to understand. Works great for small flocks, but trays can still get dirty if set too low.
- Horizontal PVC with nipple drinkers: Cleaner water and less waste. More “plumbing-y,” but still beginner-friendly if you take your time.
- Vertical nipples on a bucket: Simple and clean; fewer fittings than a long PVC run. Best if you can hang it level and solid.
- Water cups: Birds learn fast and cups reduce mess vs. open trays, but cups still need frequent rinsing.
Our rule of thumb: if you’re constantly dumping bedding out of open water, start with nipples (bucket nipples or PVC nipples). If you just want “better than a bowl,” the tray-bottom bucket is a solid first upgrade.

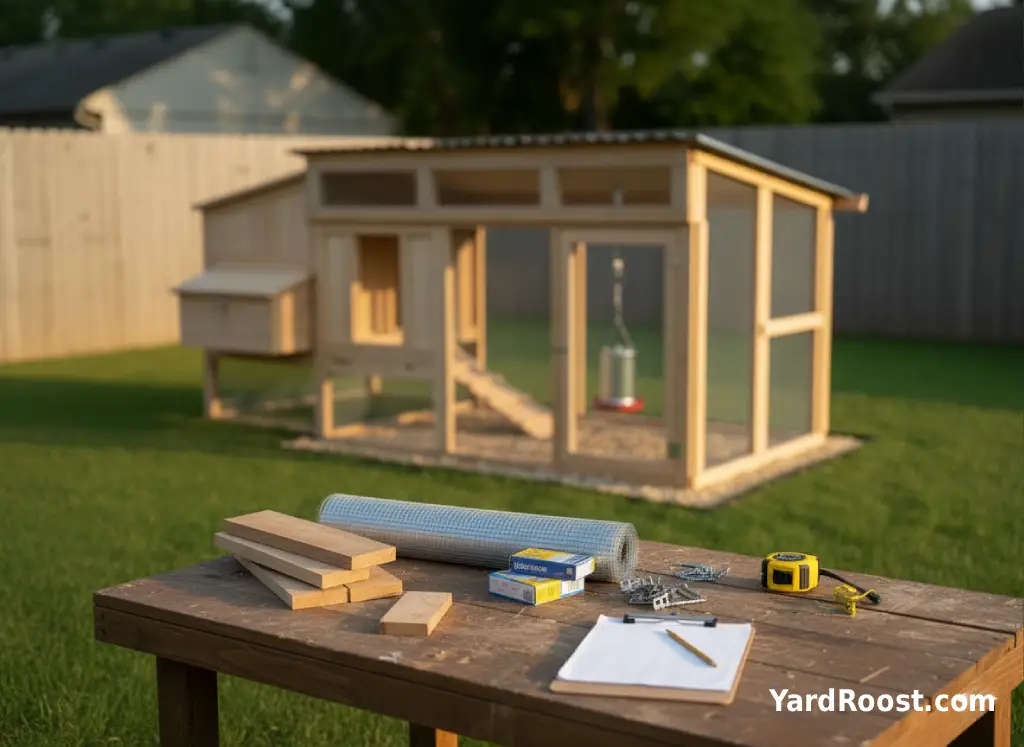
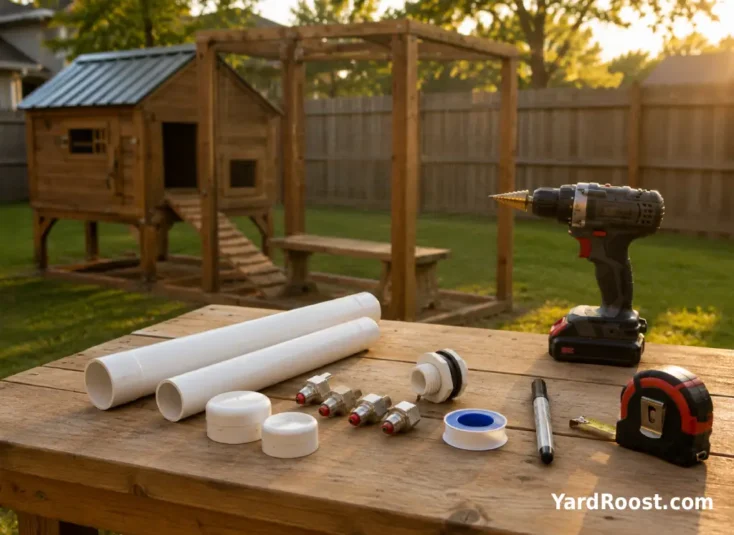
Materials And Safety Basics: Food-Safe, Leak-Proof, And Predator-Proof
DIY builds go sideways when parts don’t match or the materials aren’t meant for drinking water. Keep it boring and you’ll have fewer leaks.
- Choose the right container. Food-grade buckets (often labeled as such when sold for food storage) are a safer bet than “mystery plastic.” If you’re repurposing a container, avoid anything that held chemicals.
- Use gaskets and thread sealant correctly. Leaks usually come from one of two mistakes: overtightening (warps the gasket) or undertightening (doesn’t compress the gasket). Tighten until snug, then add a small additional turn—don’t crush it.
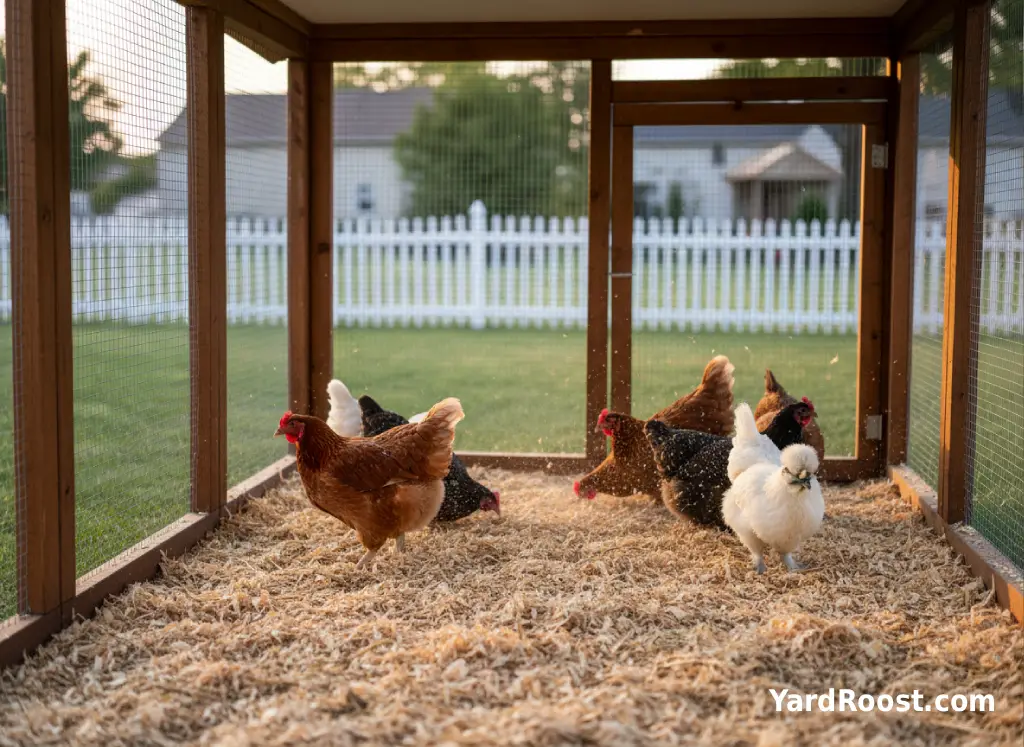
- Keep water out of reach of rodents and wild birds. A water station in the open yard is an invitation. Place your waterer inside the covered run when possible, and keep spilled water from creating muddy “hangouts.” USDA APHIS emphasizes reducing disease risks from wild birds and pests by keeping feed/water areas managed and clean.
Editorial note: A common mistake we see is using chicken wire as the only “protection” around the watering area and then wondering why raccoons show up nightly. The waterer spot becomes a routine stop for predators, so treat it like a high-traffic point in your run setup.
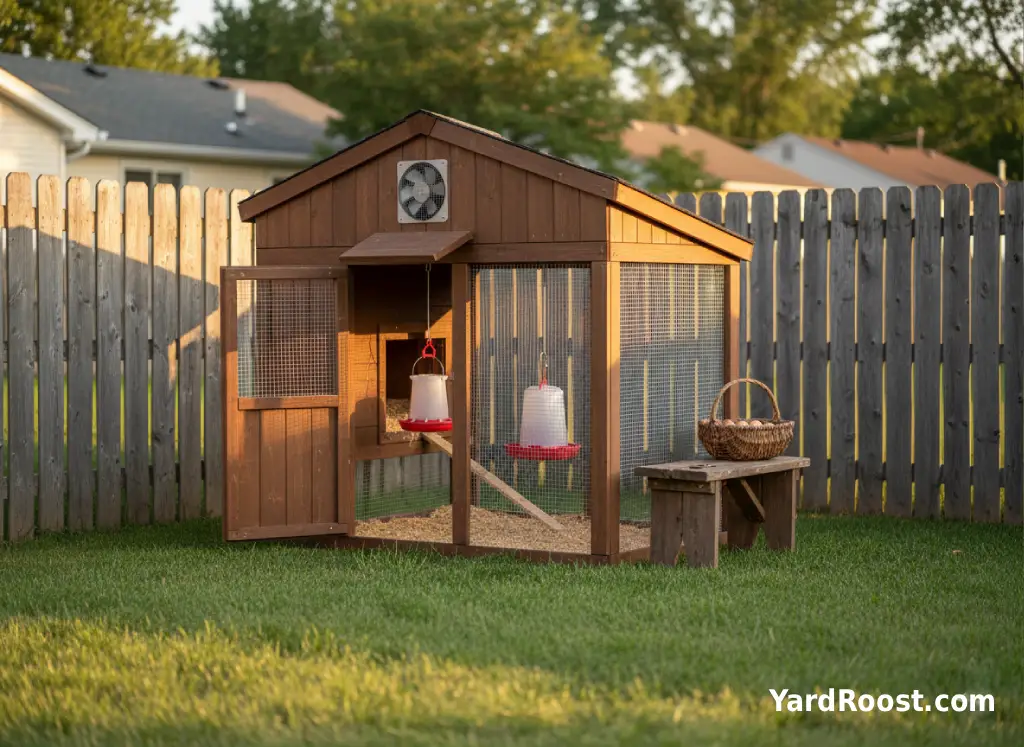
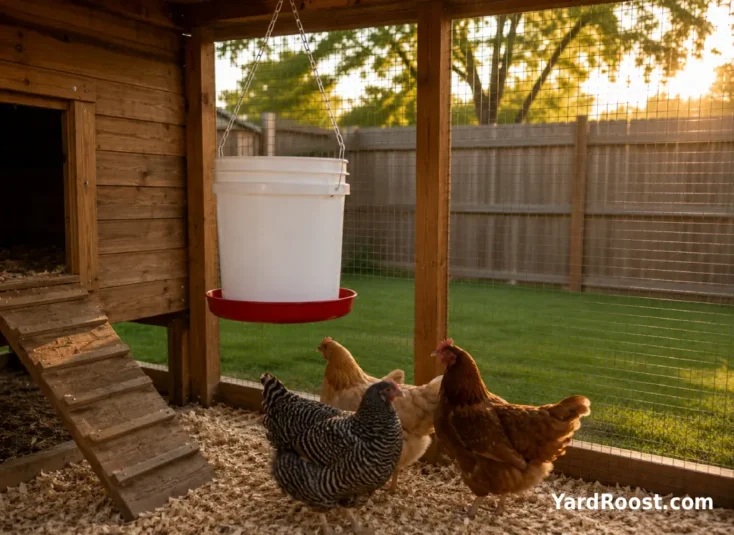
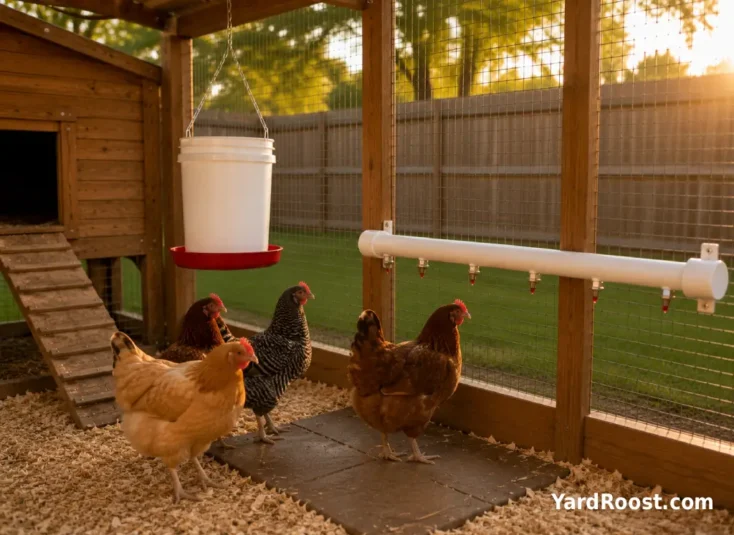
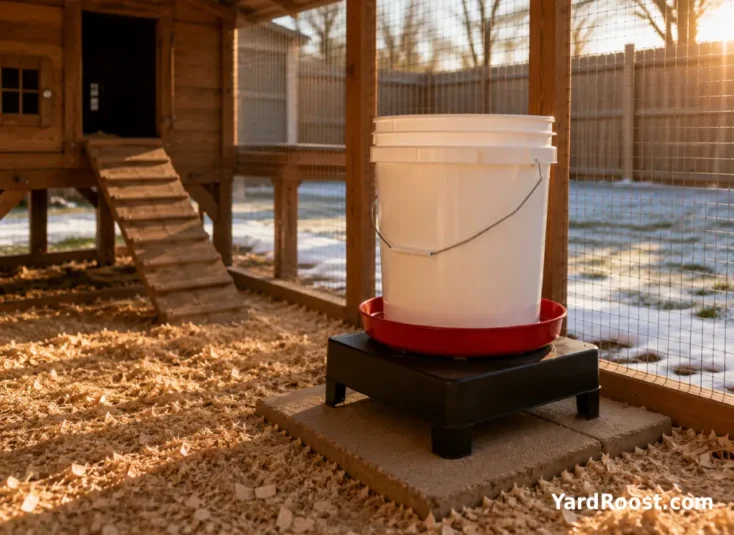
Build #1: The Simple Hanging Bucket Waterer (Fastest Weekend Win)
If you want a chicken waterer diy build that’s hard to mess up, start here. The goal is simple: keep the drinking surface higher so birds can’t scratch bedding into it as easily.
Quick Steps
- Pick a bucket waterer base (tray-style) that matches a standard 5-gallon bucket.
- Use a sturdy hanger: chain + screw-eye into a beam, or a hanging bracket.
- Hang it so the tray is roughly at the birds’ back height (higher = cleaner, too high = they struggle).
- Set a “splash zone” underneath (a flat paver works) so spills don’t turn into mud.
- Refill before it gets low—tray systems can start to gulp air and act weird when nearly empty.
Two practical tips:
- If you see bedding in the tray daily, raise the bucket 1–2 inches and watch for improvement.
- If birds are pecking the rim instead of drinking, it’s too high—lower it slightly.
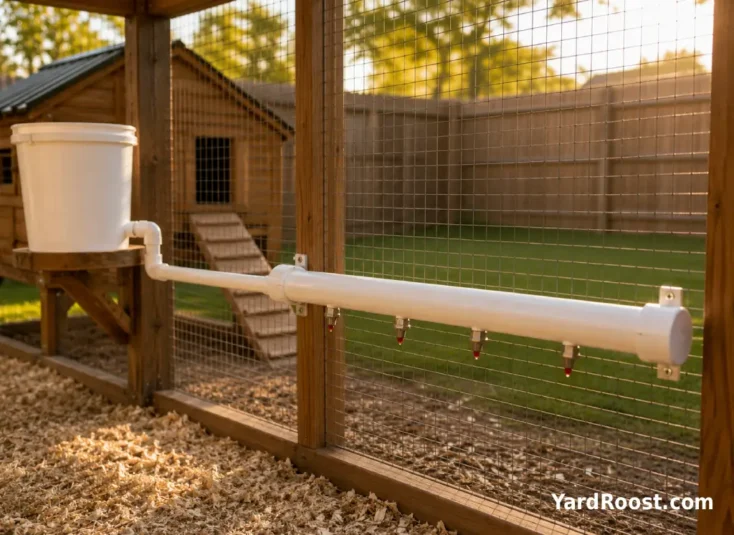
Build #2: DIY PVC Nipple Waterer (Cleaner Water, Less Waste)
This is the classic diy chicken watering system that keeps water cleaner because the birds can’t stand in it. For small flocks, a short PVC line fed from a bucket reservoir is usually plenty.
Key height clue: nipple systems work best when birds drink at a natural angle. A Texas A&M system publication for backyard poultry notes that for day-old chicks, the nipple trigger pin should be at eye level, and the height should be raised as birds grow.
Simple Build Steps (No Fancy Plumbing Required)
- Cut a PVC section (start short—2 to 4 feet is easy to manage).
- Mark nipple locations evenly spaced; drill the correct hole size for your nipple type.
- Install nipples firmly (follow the nipple manufacturer’s directions).
- Cap ends, then connect the line to a bucket reservoir (bulkhead fitting near the bottom of the bucket works well).
- Mount the PVC line solidly so it can’t twist when birds peck.
- Fill, check for drips, and adjust height so birds drink comfortably without stretching.
Two practical tips:
- Put a shallow catch tray or paver under the line for the first week—minor drips are common until you fine-tune fittings.
- If you see constant dripping, re-check that the pipe is level and that nipples are installed straight; “slightly crooked” is often enough to cause leaks.
If you want to go one step further, pair this with a shutoff valve near the bucket so you can isolate the line for cleaning without draining the reservoir.
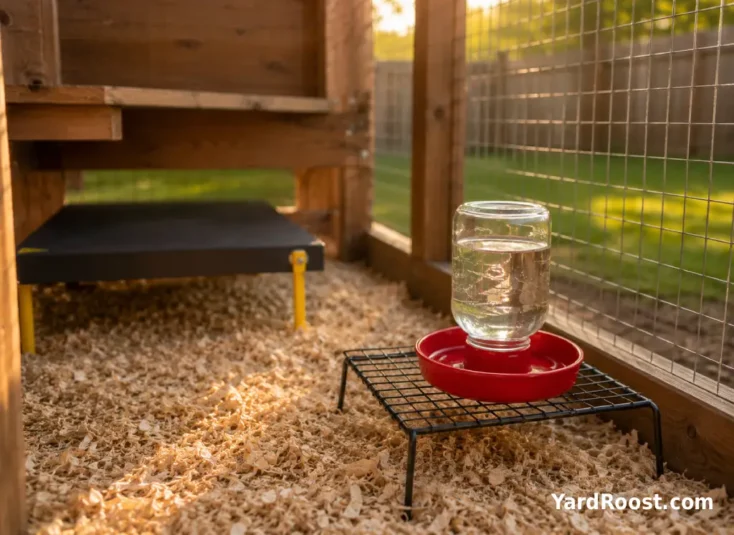
Build #3: DIY Chick Waterer That Reduces Drowning Risk And Spills
Chicks and open dishes are a messy combo. They kick bedding in, sit in it, and tip things over. A small jar-base chick waterer is the classic starter because it limits the water surface area and is harder to knock around.
Make it work better with two upgrades: raise it and stabilize it. Put the waterer on a low rack or small platform so shavings stay out (you’ll still rinse it daily, just less often with a full scrub). If the brooder is on slick flooring, add a rubber shelf liner under the rack to prevent “skating.”
Editorial note: A common mistake we see is adding marbles or rocks to a dish “to prevent drowning” and then forgetting to scrub under them. That turns into a grime trap fast. A purpose-made chick base is usually cleaner and simpler.
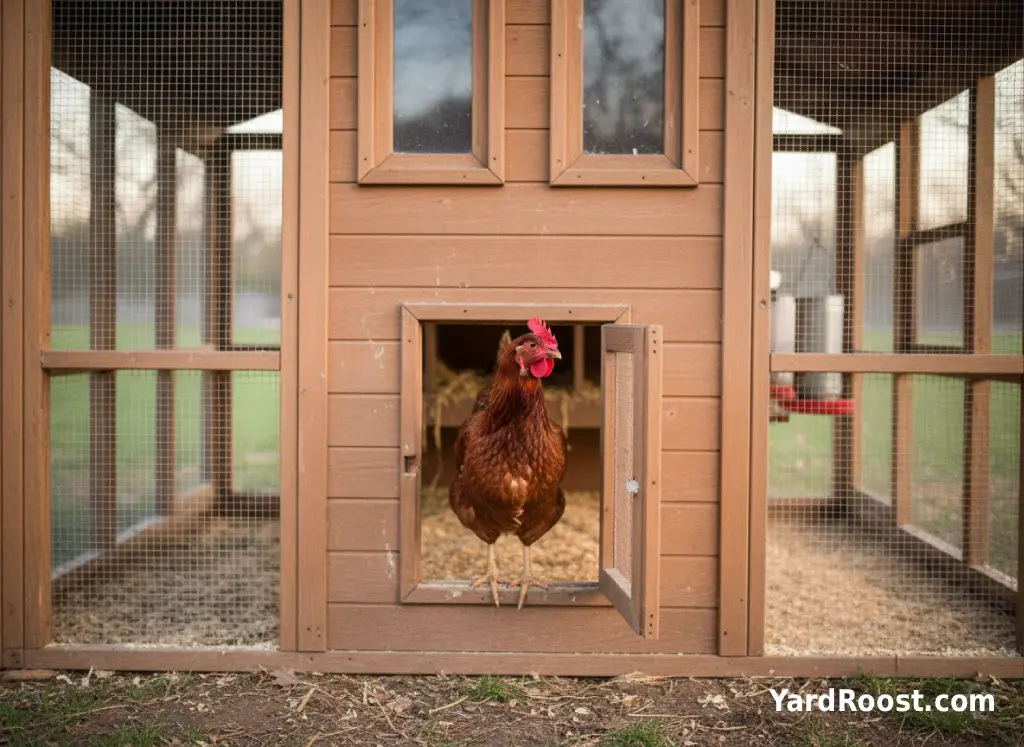
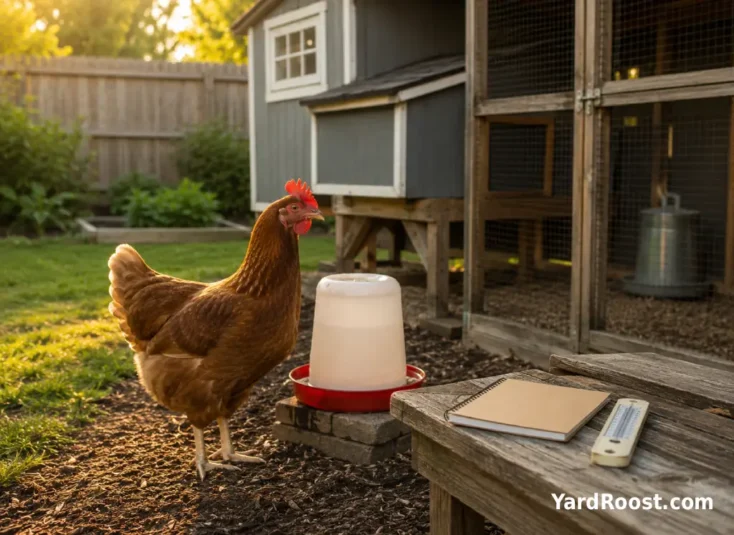
Placement And Height: The Secret To Cleaner Water (And Less Work)
Most “my waterer is gross” problems are actually placement problems. Put water where it stays dry around it and where birds can’t scratch litter into it every time they walk by.
Use these placement rules: keep water out of the main dust-bath zone, away from the coop door “traffic jam,” and not directly under roosting spots (droppings happen). If your run has a roofed section, place water there so rain doesn’t turn the area into mud.
Height checks that work: for open trays, aim around back height so they can’t easily scratch bedding in. For nipples, use the “comfortable angle” test—birds should reach without stretching tall or crouching low. For very small birds or chicks on nipples, the guidance from poultry extension materials is to keep the trigger pin about eye level and raise it as they grow.
If multiple birds crowd the waterer and you see shoulder-bumping, add a second drinking point before you assume “they need a bigger flock-size waterer.” Crowding alone can cause spills and muddy zones.
Winter Options: DIY Heated Chicken Waterer Without Creating A Fire Hazard
A diy heated chicken waterer should prioritize safety over cleverness. The safest “DIY” approach for most backyard keepers is pairing a standard waterer with a purpose-built heated base or heated dog bowl designed for outdoor use—then installing it in a way that keeps cords protected and the area dry.
- Set heaters on a non-flammable surface: a concrete paver is a simple, cheap upgrade.
- Protect cords: route them where birds can’t peck and where rodents can’t chew; use a protective conduit if needed.
- Keep connections dry: use weather-rated connections and keep them off the ground.
- Plan for power loss: keep a backup plan (a spare jug you can swap in morning/evening) for very cold snaps.
Editorial note: A common mistake we see is placing a heater directly on bedding “just for tonight.” That’s how small risks become big ones. If you can’t set it on a hard surface, skip the heater and use frequent swaps until you can.
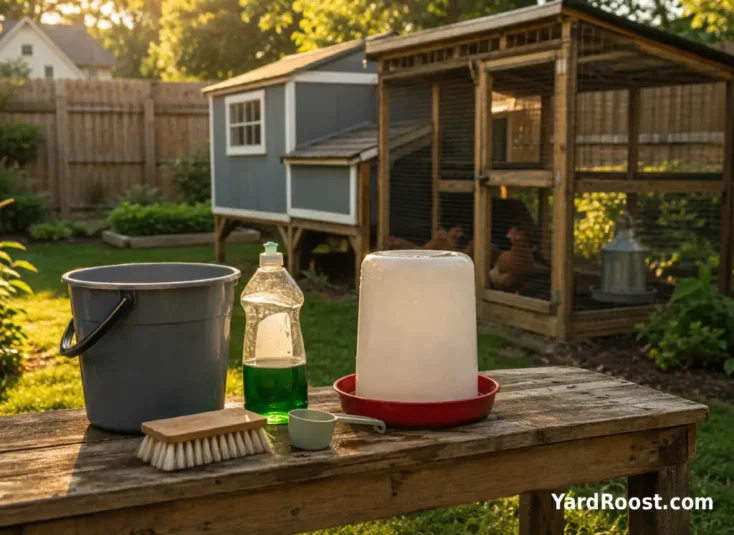
Cleaning, Sanitizing, And Biosecurity: What Actually Moves The Needle
Clean waterers aren’t just about “looking nice.” They help reduce gunk buildup and keep your watering system working the way it should. And they’re part of basic backyard flock hygiene: the CDC repeatedly emphasizes handwashing right after touching poultry or anything in their environment, and avoiding behaviors like kissing or snuggling birds that can spread germs.
A realistic cleaning routine: quick rinse daily for open/tray systems (more often if you see bedding), and a deeper scrub on a schedule you can actually keep (weekly is a common cadence for many small flocks, but adjust based on slime/algae). Nipple systems still need periodic flushing and inspection.
Sanitizing option (when you need it): Cornell’s small farms guidance (and a University of Connecticut poultry extension handout) describes soaking waterers and feeders in a chlorine solution at about 200 ppm, often referenced as roughly 1 tablespoon of household bleach per gallon of hot/boiling water for a thorough disinfecting soak. Follow label directions and rinse well afterward.
USDA APHIS also highlights cleaning and disinfecting poultry areas as part of biosecurity, especially to reduce disease risks carried by wild birds, pests, and contaminated materials.
If you want a deeper coop hygiene routine, see: Cleaning a Chicken Coop.
Troubleshooting DIY Chicken Watering Problems (Leaks, Algae, And “Why Won’t They Use It?”)
DIY systems are simple… until they aren’t. Here are the issues we see most often and the fixes that usually work.
- Slow leaks at fittings: Re-seat the gasket and re-tighten gently. If you used thread tape, remove it and re-wrap neatly (messy wraps can cause cross-threading).
- Nipples drip constantly: Confirm the pipe is level and nipples are installed straight. Also check for grit—tiny debris can prevent a good seal.
- Green algae in open trays: Move the waterer into shade (or the covered run), scrub more often, and avoid clear containers that let light in.
- Birds won’t use nipples: Tap the nipple so a droplet forms, then let curious birds investigate. Keep a backup open water source for a short transition period so nobody goes without water.
- Muddy “waterer crater” forming: Put the station on pavers or a rubber mat and address drips. Mud invites pests and makes cleaning miserable.
Common Mistakes To Avoid (And Easy Fixes)
We’ll save you some frustration—these are the “repeat offenders” we see with diy chicken waterer setups:
- Setting the waterer on the ground: It becomes a bedding magnet. Fix: raise it to roughly back height (open trays) or a comfortable drinking angle (nipples).
- Skipping a splash plan: Small drips turn into mud. Fix: add pavers, a mat, or a catch tray under nipples.
- Using random containers: Mystery plastic + old residues = not worth it. Fix: start with a food-grade bucket or new container meant for potable water.
- No cleaning schedule: “It looks fine” turns into slime fast. Fix: quick rinse often, deeper scrub on a routine you’ll keep.
- Overbuilding first: A 12-foot PVC line is harder to level, clean, and winterize. Fix: start short and expand once you know what works.
Editorial note: The most expensive DIY waterer is the one you rebuild three times because you chased “perfect” instead of “reliable.” Build simple, test for a week, then upgrade.
When To Get Professional Help
Water issues can become health issues quickly, especially in extreme heat or if a system fails while you’re away. We’re not veterinarians, but we do recommend contacting an avian vet (or an experienced poultry professional) promptly if you notice signs that suggest a bird may not be getting enough water.
Get help sooner rather than later if you see: repeated lethargy, persistent weakness, refusal to drink, ongoing diarrhea with rapid decline, severe heat stress signs (collapse or inability to stand), or multiple birds acting unwell at the same time. While you arrange help, focus on safe basics: provide accessible clean water, shade, and reduce stressors (like crowding at one water point).
If your concern is mostly heat management, review your coop airflow and shade setup: Chicken Coop Ventilation.
Quick Checklist: A DIY Chicken Waterer That Works Long-Term
If you want a fast way to sanity-check your setup before you call it “finished,” run through this list:
- Water access is easy for the smallest birds in the group (no stretching or struggling).
- The station is raised and not in the main dust-bath or doorway traffic zone.
- There’s a splash plan (paver, mat, tray) to prevent mud and pests.
- You can clean it quickly without disassembling half the coop.
- In winter, heat sources are stable, dry, and on a non-flammable base.
A good DIY build fades into the background—which is exactly what you want. Less mess, fewer refills, and a watering system that’s easy to maintain beats a complicated setup every time. Start with a simple version, watch what your birds do for a week, and adjust height and placement before you add more parts. And don’t underestimate hygiene: the CDC’s backyard poultry guidance keeps coming back to the same basics—wash hands after contact, keep coop areas clean, and avoid close face-to-bird contact that can spread germs.
Once your waterer is dialed in, the next “quality of life” upgrade is usually feed management and spill control—because if you fix water mess but still have feed everywhere, you’ll still attract visitors you don’t want.