If you’re building your first chicken coop, it’s tempting to start with the fun stuff—cute paint colors, a little “egg door,” maybe a Pinterest-y roofline. But the coops that actually stay pleasant to own (and pleasant for your flock) are built around three unglamorous basics: enough space, smart ventilation, and serious predator resistance.
This guide walks you through a practical build that works for beginner to intermediate backyard keepers in the U.S., whether you’re planning for 6 hens, 10 chickens, or a flock closer to 20. You’ll get clear sizing targets, a build order you can follow, tips for building cheap (including pallets), and the little details that make a coop easier to clean and harder to break into. Along the way we’ll call out mistakes we see all the time—like sealing a coop “tight” for winter and accidentally trapping moisture and ammonia inside.
One note before you buy lumber: check your local ordinances, HOA rules, and setbacks. It’s a lot easier to adjust a footprint on paper than after the posts are set.
Plan Your Coop Size First (It’s Cheaper Than Rebuilding)
Build for the flock you’ll actually have, not the flock you wish you had. A coop that’s slightly bigger costs a little more in materials, but a too-small coop costs you forever: wet litter, squabbles, dirty eggs, and that lingering “ammonia” smell that makes chores unpleasant.
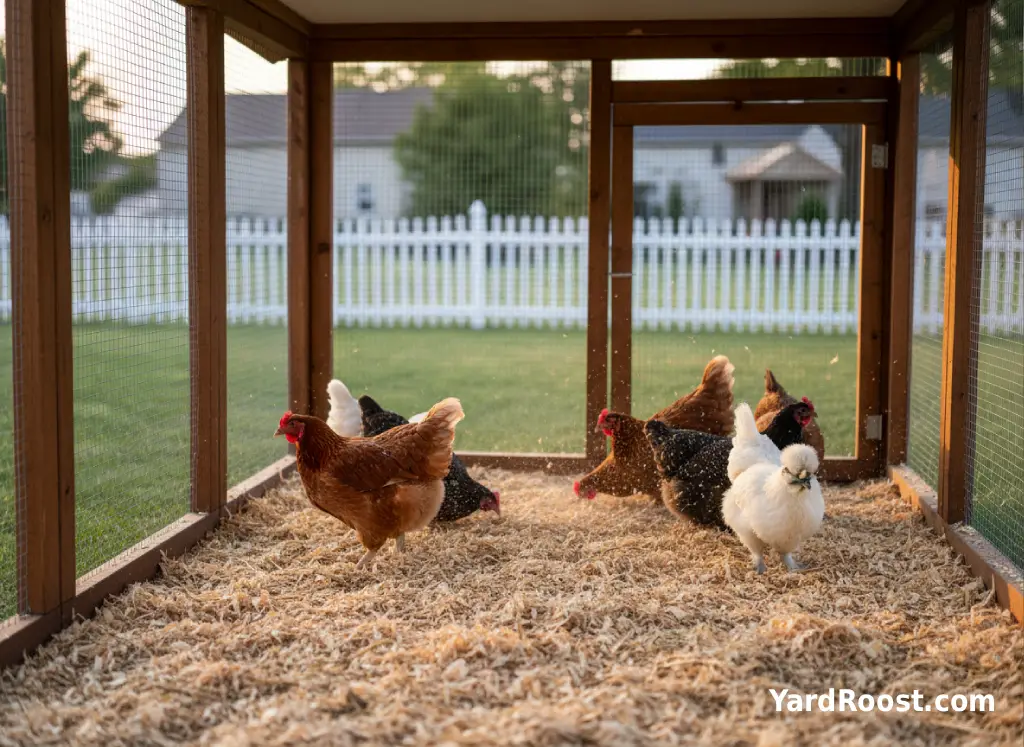
A practical target for many backyard flocks is about 3–4 sq ft of indoor coop floor space per standard hen if they have regular access to an outdoor run, plus around 10 sq ft per bird in the run when you’re planning a confined run (bigger is always friendlier). If birds will be confined indoors for long periods, plan much more indoor space.
| Flock Size | Indoor Coop Floor (Typical Range) | Run Area (Helpful Target) | Nest Boxes |
|---|---|---|---|
| 6 hens | 18–24 sq ft | ~60 sq ft | 2 (often enough) |
| 10 hens | 30–40 sq ft | ~100 sq ft | 2–3 |
| 20 hens | 60–80 sq ft | ~200 sq ft | 4–5 |
Two sizing tips that save headaches
(1) Plan a human-friendly cleanout path—at least one side you can comfortably reach with a rake and shovel. (2) Sketch where droppings will land at night (under roosts). If your roost area is cramped, cleaning becomes a daily punishment instead of a quick weekly reset.
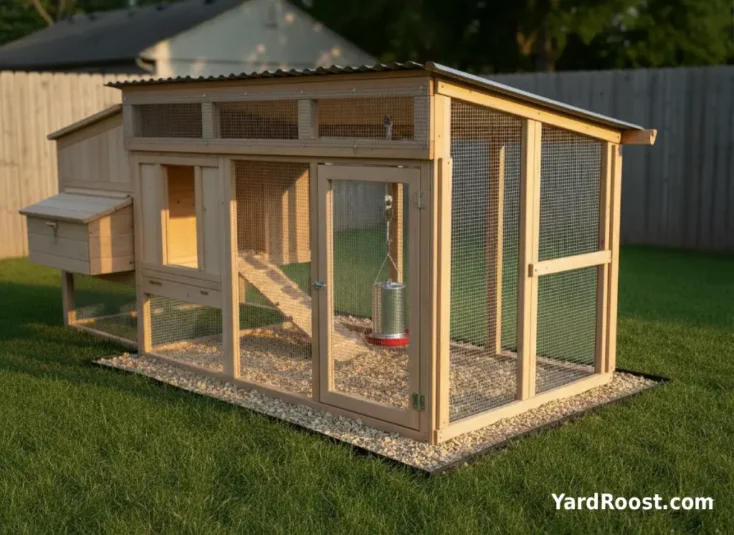
Choose a Simple Layout That’s Easy to Clean
For a first build, “simple” wins: a rectangle coop with a shed roof is easier to frame, easier to roof without leaks, and easier to ventilate correctly. Fancy shapes create fancy leak points.
Think in zones:
- Dry zone: roosts and droppings area (you’ll clean this most).
- Egg zone: nest boxes placed lower than roosts (so birds don’t sleep in them).
- Service zone: doors, access panels, and feed storage so chores stay quick.
A common mistake we see is putting tiny “cute” access doors everywhere and skipping the one door that matters: the one that lets an adult reach the back corner with a shovel. If you can’t clean it, it won’t stay clean.
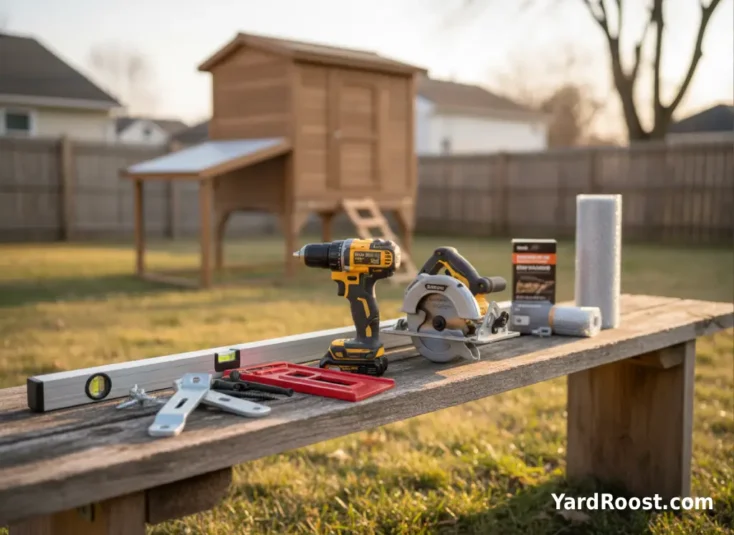
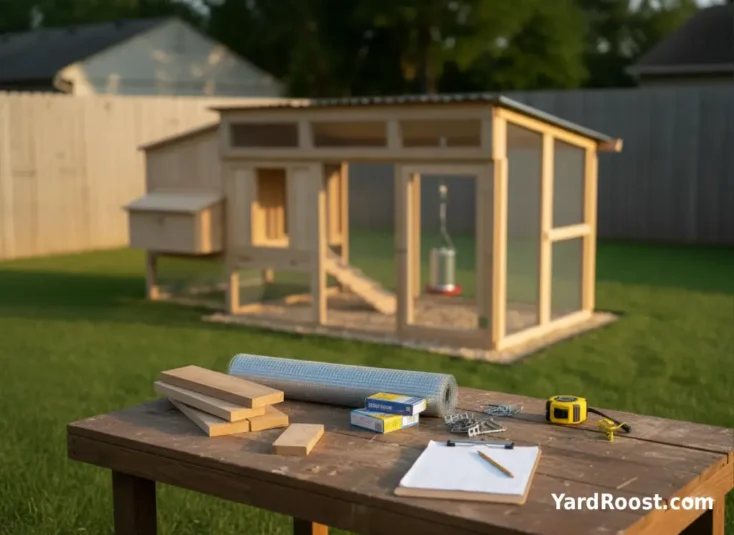
Tools and Materials Checklist (Buy Once, Don’t Rebuy)
You don’t need a full workshop, but you do need the right fasteners and predator-proof materials.
- Framing: 2x4s (or 2x3s for lighter builds), exterior-grade screws
- Sheathing: exterior plywood or siding panels rated for outdoor use
- Roofing: metal roofing or shingles + drip edge and roofing screws
- Predator barrier: galvanized hardware cloth (not chicken wire) for windows/vents/run
- Doors: heavy-duty hinges, barrel bolts or latch hardware you can lock
- Flooring: plywood on joists, or a raised coop floor; removable droppings board is a bonus
- Basics: drill/driver, saw, tape measure, level, square, stapler or washer-head screws
Fastener tip: For hardware cloth, staples alone are easy to pop. Use washer-head screws (or screws with fender washers) to clamp mesh tight, especially on the run.
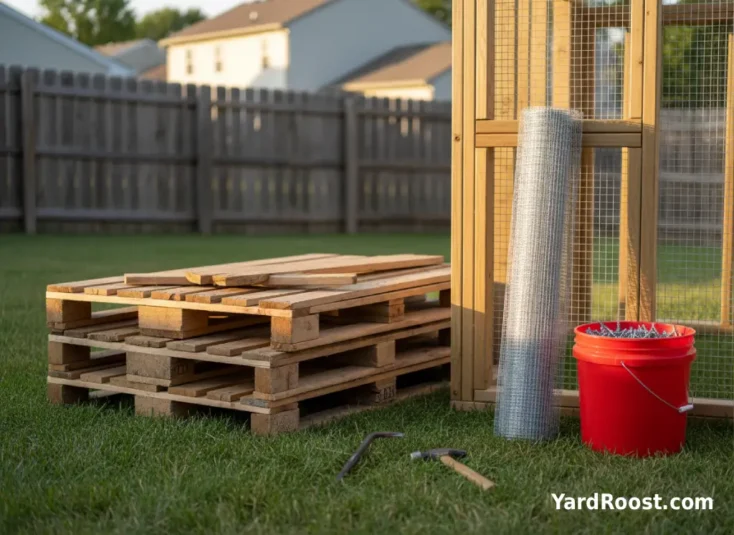
How to Build Cheap With Pallets (Without Regretting It)
Pallet builds can absolutely be budget-friendly, but pallet wood is “mystery wood” unless you’re picky. If you’re going to use pallets, choose them like you’re choosing food-grade containers: you’re trying to avoid chemical treatments and spills.
Practical pallet rules:
- Skip questionable pallets: avoid pallets with chemical fumigation markings and avoid pallets that smell like chemicals or show spill stains.
- Choose cleaner sources: pallets from dry goods are usually a safer bet than pallets from industrial or chemical environments.
- Use pallets for “outer” structure: they’re great for siding, storage, and windbreaks—less ideal for structural load-bearing unless you reinforce.
If you’re building “cheap,” put your real money in two places: roofing (to stay dry) and predator-proof mesh and latches (to keep birds alive). Everything else can be simplified.
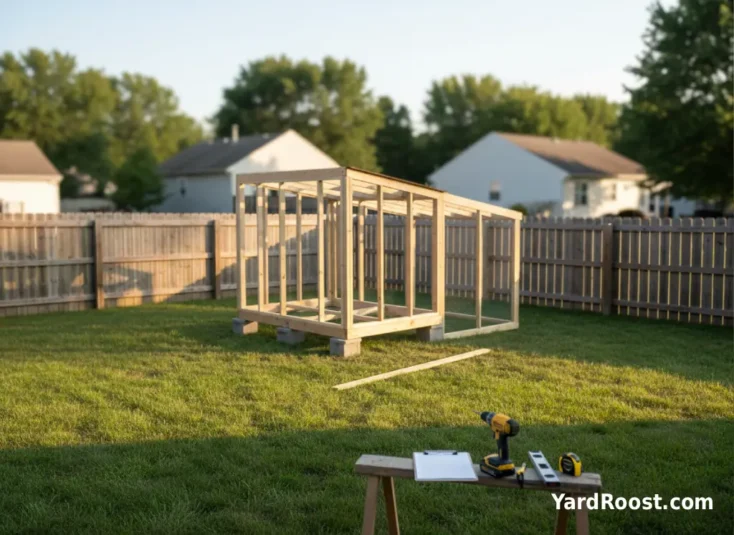
Step-by-Step Build Order (The Practical Way)
If you build in a sensible order, you’ll avoid redoing work and you’ll catch “oops” moments while they’re still easy to fix.
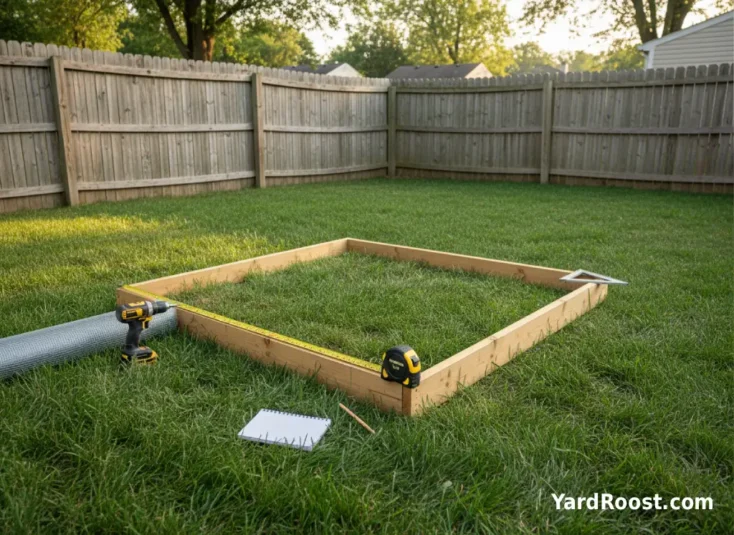
- Pick a dry site: slightly elevated ground beats “perfectly flat” that turns into a puddle.
- Build and level the base: square it carefully; a crooked base makes every next step harder.
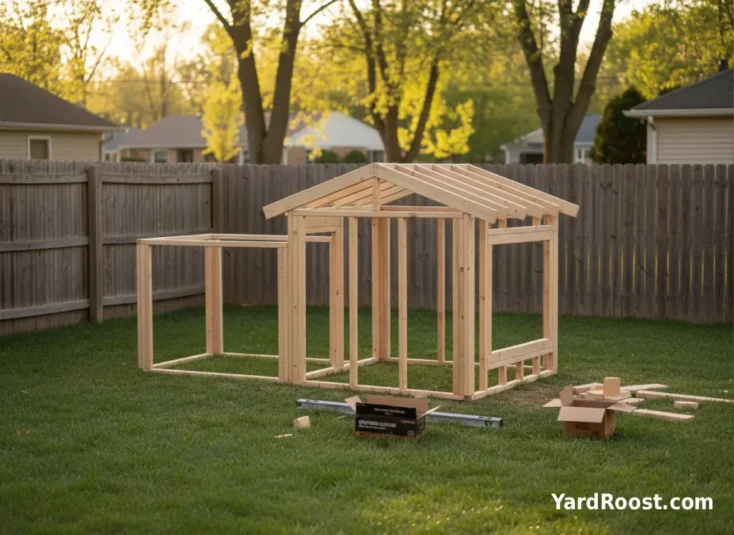
- Frame the floor and walls: keep it simple—rectangle walls, solid corners, minimal fancy cuts.
- Add the roof: get the coop weather-tight early so you can work in light rain and not ruin wood.
- Cut in ventilation and windows: high vents with predator-proof mesh, planned before interior fixtures.
- Install doors, latches, and interior: roosts, nest boxes, droppings area, then bedding.
Photo tip: If you want “step-by-step with pictures,” take a quick photo at the end of each step above. Later, you’ll be glad you can see where studs, screws, and mesh seams actually are.
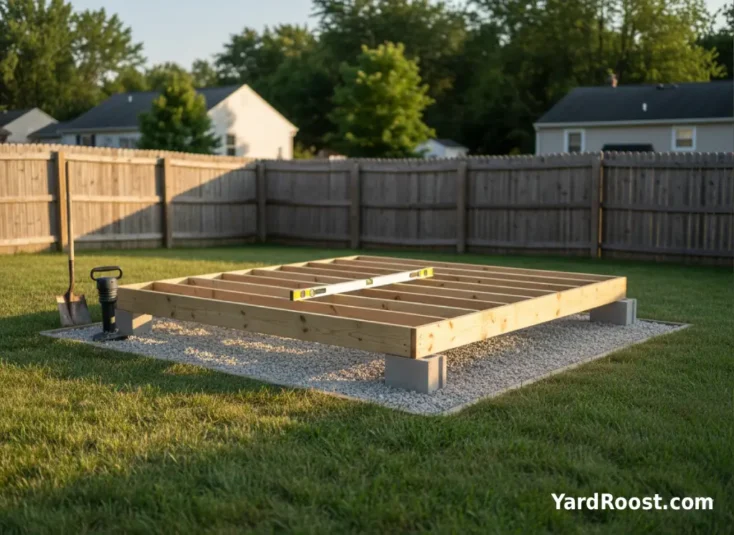
Build the Floor and Base So It Stays Dry
Moisture ruins coops faster than cold. A raised base over a gravel pad is a simple, beginner-friendly way to keep the floor dry and discourage rot. Even a few inches of elevation can help with splash-back and puddling.
Two proven “dry coop” moves:
Use a roof overhang (even a small one) so rain doesn’t run down the walls into the run. And keep bedding off bare ground—either use a raised floor, or design the coop so you can clean it thoroughly without digging out mud. If you’re considering a deeper bedding system, our guide to the deep litter method explains how it works, what materials to use, and how to keep odors and moisture under control.
Beginner trap: building the coop tight to the ground because it feels “stable.” It often becomes a damp box that’s hard to air out and hard to inspect for rodents.
Ventilation and Moisture Control (Draft-Free Matters)
A good coop smells like wood shavings—not ammonia. Ventilation is what carries out moisture and fumes, especially in winter when windows are closed and droppings build up overnight. The trick is to move air above where birds sleep, not blast them with a cold draft at roost height.
Easy rule of thumb: place vents high on the walls under the roofline and keep the “bird zone” more sheltered. If you’re winterizing with plastic, don’t seal the top of the coop like a cooler—leave high ventilation open so moisture can escape.
- Use hardware cloth on all vents: a vent is just a predator door without mesh.
- Think cross-breeze, not wind tunnel: two high vent areas beat one big hole.
- Watch your bedding: damp bedding is your early warning sign that ventilation (or roof leaks) needs attention.
A common mistake we see is “draft-proofing” by blocking every gap—then wondering why the coop gets wetter and smellier. Moisture management is the real winter skill.
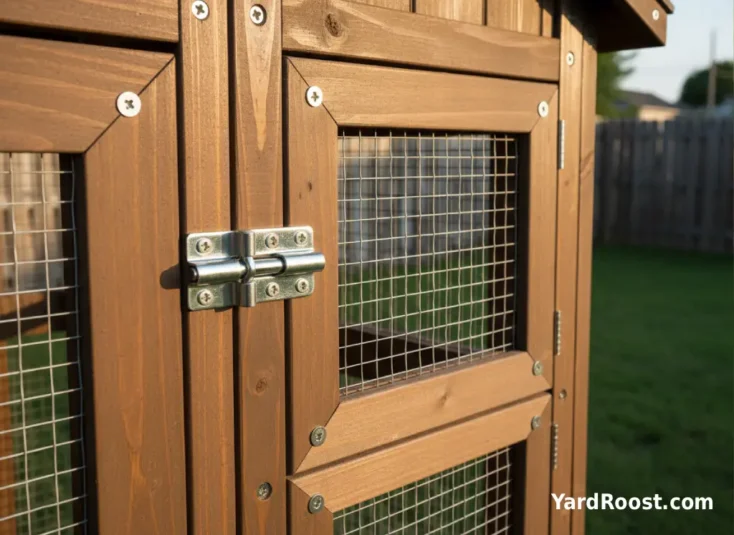
How to Build a Chicken Coop Door That Predators Hate
Doors are where most “break-ins” happen. Raccoons are famously good at simple latches, and any gap that fits a paw can become a problem fast.
Build the door like an exterior gate: a framed door (not just a flat board), solid hinges, and a latch you can clip or lock. Aim for tight gaps around the door edges. If you can easily fit a finger through a corner gap, assume a predator can work it.
Two small upgrades that matter: add a stop strip around the inside of the door frame (so the door closes against wood, not air), and use two latching points if the door is tall (top and bottom). Also, cover any door windows with hardware cloth—even if there’s “glass” or plastic—because broken windows happen.
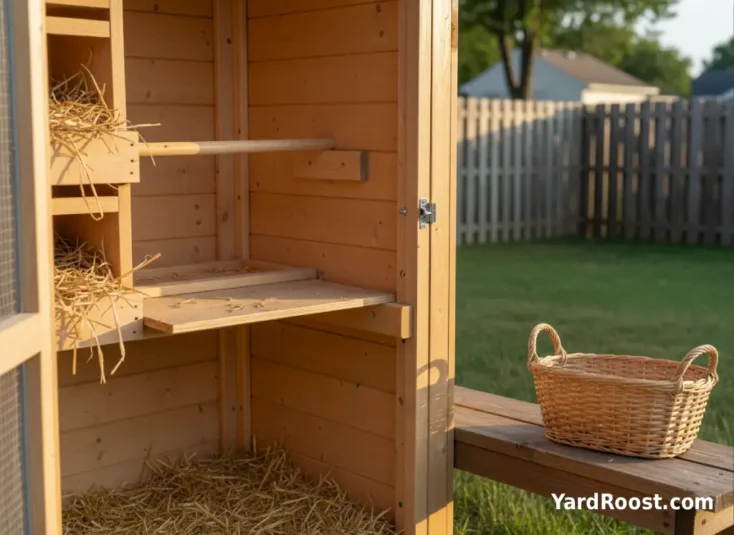
Roosts and Nest Boxes: Build the Interior Before Birds Move In
Interior features don’t need to be fancy, but they do need to be positioned well. Your goal is clean eggs and a coop that doesn’t become a droppings-covered obstacle course.
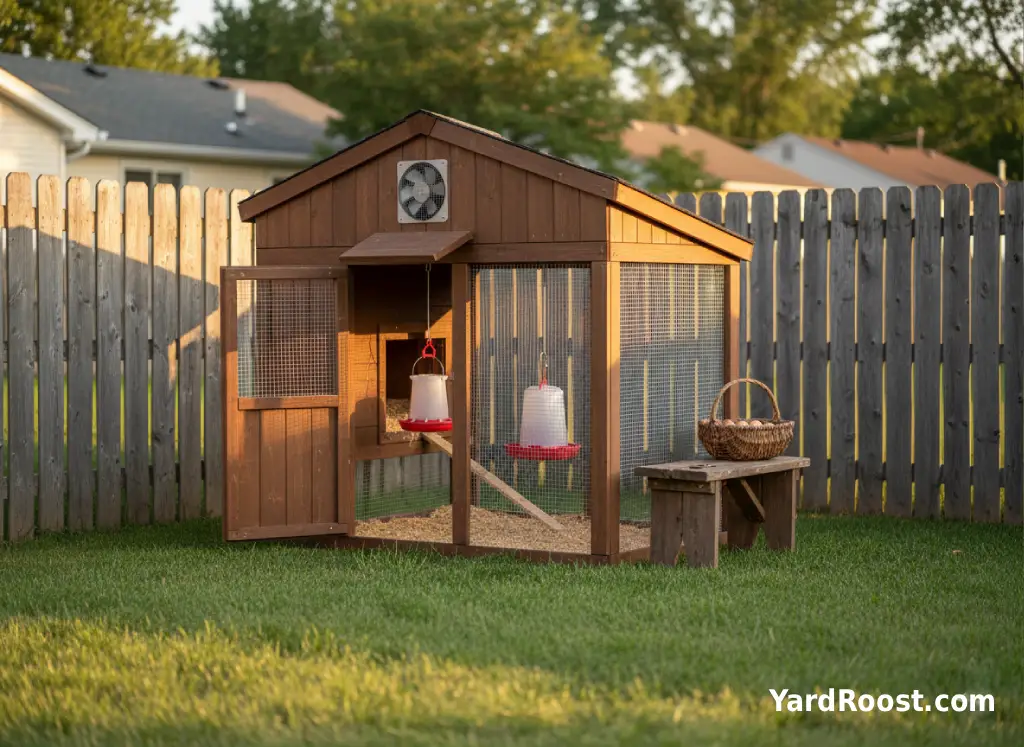
Roost basics: many keepers have good results using a wider board so birds can rest flat-footed and cover toes in cold weather. Plan about 8–10 inches of roost length per bird and keep roosts stable so they don’t wobble.
Nest box basics: a common, workable size for standard hens is about 12 inches by 12 inches by 12 inches. You typically don’t need one box per hen; roughly one box for every 4–5 hens often works. Put nest boxes lower than roosts so birds don’t sleep in them, and give yourself access to collect eggs without crawling into the coop.
Clean-coop hack: Add a droppings board under the roost. It turns “scrape and dump” into a 60-second chore instead of a full bedding excavation.
Predator-Proof the Run (This Is Not the Place to “Save Money”)
If you only splurge once, splurge here. “Chicken wire” keeps chickens in; it does not reliably keep determined predators out. Use a stronger mesh for run walls and any openings.
- Top coverage matters: a covered run reduces hawk risk and keeps snow and rain out of the run floor.
- Stop digging predators: bury hardware cloth down along the perimeter or create an outward “apron” so digging hits mesh.
- Upgrade latches: use latches you can clip or lock; assume clever hands will test them.
- Eliminate gap corners: reinforce seams, corners, and where the run meets the coop.
Roof, Drainage, and Weatherproofing That Actually Works
Most coop problems start as water problems. A roof that sheds water cleanly, plus drainage that sends runoff away from the coop and run, keeps bedding drier and odors lower.
Two weatherproofing wins: choose a roofing material you trust (metal roofing is popular because it’s quick to install and sheds water well), and include an overhang so rain doesn’t hammer the walls. If you can add a simple gutter or a drip edge that pushes water away from the run side, you’ll prevent a lot of muddy misery.
Don’t over-insulate at the expense of ventilation: in many backyard setups, dryness and airflow matter more than trapping heat. If you add windbreaks in winter, keep high ventilation working so moisture doesn’t build up.
How Much Does It Cost to Build a Chicken Coop?
Costs swing wildly based on lumber prices, roofing choice, and how serious you get about the run. The best way to stay on budget is to price your build in “buckets,” then decide where you’ll simplify.
- Must-pay bucket: roofing + predator-proof mesh + latches/hinges
- Flexible bucket: siding style, paint, trim, fancy windows
- Can-save bucket: pallets for siding, repurposed solid doors, reclaimed framing (if sound)
Budget reality check: “cheap” usually means you already have some materials on hand (or you’re using clean reclaimed wood). If you’re buying everything new, the run materials and hardware cloth can become the biggest line item—so plan that part first and let the coop exterior stay plain.
Common Mistakes to Avoid (What We See Over and Over)
- Building too small: it seems fine until the first wet week. Fix by expanding the run, adding a covered “dry corner,” or reworking interior layout for better cleaning access.
- Skipping high ventilation: a sealed coop traps moisture and odors. Fix by adding high vents and protecting them with hardware cloth.
- Using weak mesh “to save money”: it’s cheaper until it isn’t. Fix by reinforcing openings and run panels with strong galvanized mesh and solid fasteners.
- Tiny access doors: if you can’t reach it, you won’t clean it. Fix by adding one full-size cleanout door or a removable panel.
- Nest boxes higher than roosts: birds sleep where it’s highest. Fix by lowering nest boxes or raising roosts so nests stay for eggs, not sleeping.
A common mistake we see is treating the coop like a decorative shed. Chickens are hard on buildings: moisture, ammonia, scratching, dust, and curious beaks. Build for function first, and you’ll still have something you’re proud of.
Seasonal Tweaks: Summer Shade and Winter Dryness
Great coops adapt to weather without becoming sealed boxes. In summer, your priorities are shade and airflow. In winter, your priority is dryness (not “warmth at all costs”).
Summer:
Add shade cloth to the run, keep water in a shaded spot, and maximize safe airflow through protected openings.
Winter:
Block wind at bird level while keeping high ventilation open so humidity can escape. Watch bedding: if it stays damp, you need more airflow or you have a roof/drainage problem.
If your coop sits in full sun all day, consider placing the run where it gets afternoon shade or adding a roofed section of run so birds always have a dry, shaded place to hang out.
Basic Biosecurity and Family Hygiene Around the Coop
Even healthy-looking poultry can carry germs that make people sick, so build your coop routine with simple hygiene habits. The easiest “biosecurity” is consistency: dedicated coop shoes, a place to wash hands, and a plan for new birds.
- Wash hands after coop chores: especially after handling birds, eggs, or anything in the coop/run area.
- Keep coop shoes out of the house: a cheap boot tray by the run gate works wonders.
- Quarantine new birds: keep new additions separate before mixing with your flock to reduce disease risk.
Sources we trust for these build and care basics: Oregon State University Extension, Penn State Extension, University of Maryland Extension, UF/IFAS Extension, Ohio State University Extension (Ohioline), Oklahoma State University Extension, Poultry Extension resources, and CDC Backyard Poultry guidance.

Build for Dryness, Airflow, and Easy Cleaning
A good chicken coop doesn’t need to be complicated—it needs to be dry, well-ventilated, and hard for predators to defeat. If you focus on those three, your flock is more comfortable, your eggs are cleaner, and chores stay manageable instead of turning into a daily battle with wet litter and funky smells.
Start by sizing for your real flock (including the “we’ll probably get a few more” reality), then choose a simple layout that you can clean without crawling on your knees. Put your budget into the roof, strong mesh, and secure latches. If you build with pallets, be selective and treat reclaimed wood like a food-contact surface: avoid mystery pallets and anything that looks or smells contaminated.
Finally, remember that the coop you build today will teach you what you want next. Leave yourself an upgrade path: a run you can expand, vents you can adjust, and doors you can improve. That’s how most great backyard coops are born—one sensible improvement at a time.